
I recently found this fabric at an antique store for $1 and I knew exactly what I wanted to make out of it: a half apron to match my farmhouse kitchen! I’m one step closer to being like Ma Ingalls!
My husband took care of baby Elliot so I could enjoy the creative process of putting this apron together. I made a cup of tea, played some podcasts, and finished it within a few hours. I am so pleased with how it turned out!
I wanted my apron to remain plain and simple, but you can add ruffles, coordinating fabrics, or lacy embellishments. I encourage you to make this project your own. There’s something special about crafting a handmade item that reflects your style and personality.
I’ve also sewn other items for our home, so check these out too! Cafe Curtains, Drop Cloth Banner, Pillow Cases, Table Runner, and more!
This blog post gives you everything you’ll need in order to sew your own half apron: a list of needed materials, pictures to reference, tips and tricks, and details instructions. This is a simple project, so make one for yourself or as a thoughtful gift! There’s nothing quite like a handmade item filled with patience, love, and dedication. A list of more simple sewing projects is located at the very end of this post. Let’s make an apron!
How to Sew a Half Apron
Keep In Mind:
- I suggest ironing your fabric before taking any measurements or doing any cutting. A few wrinkles make more of a difference than you’d think.
- I added one large pocket to my apron, but you could quite easily make it into two smaller pockets if you prefer. I’ll explain how in Step 6.
Tools You Will Need:
- Sewing machine
- Scissors
- Measuring tape
- Pins
- Fabric
- Coordinating thread
- Iron
Overview:
Here’s a brief overview of the process. See each step below for further information and tips.
- Step 1. Iron the fabric.
- Step 2. Measure out the apron pieces. There will be four pieces.
- Step 3. Cut the pieces according to the measurements.
- Step 4. Creating and sewing the main piece.
- Step 5. Creating and sewing the straps.
- Step 6. Creating and sewing the pocket.

Instructions:
Step 1. Iron
Fabrics like linen or drop cloth wrinkle quite easily. Iron your fabric before taking any measurements. Those wrinkles can make a difference!
Step 2. Measure
Here’s the pieces you will need to measure out.
- Two straps (measure 45 inches long and 4 inches wide)
- One large panel for the main apron piece (measure 20 inches long and 27 inches wide)
- One small panel for the pocket (measure 13 inches long and 17 inches wide)
Keep in Mind: These dimensions can be altered according to your personal preference. This is the size I wanted my apron to be, but feel free to make it longer or wider, with shorter or longer straps, with more pockets or no pocket at all. Make it your own!
Step 3. Cut

- Cut out the 4 pieces according to your measurements. You should have two straps, one main piece, and one pocket.
Step 4. The Main Piece
- Begin by folding the top and bottom edge of the main piece over 1/4 inch.
- Proceed to fold the top and bottom edges over another 1/4 inch to create a clean hem on all sides.
- Repeat this process with the short sides of the main piece. Folding them over 1/4 inch and then another 1/4 inch to create the clean hem.
- You can pin these hems in place, or press them down with an iron. NOTE: Ironing will create a crease and keep the hem in place pretty well. I prefer to use the ironing method rather than messing with all the pins.
- Sew the hems on all sides of the main apron piece.
Step 5. The Straps

- For the straps, fold the long sides over 1/4 inch.
- Proceed to fold the long sides over another 1/4 inch to create a clean hem.
- Pin or iron the hem in place.
- Repeat the process for the short sides. Fold over 1/4 inch and then another 1/4 inch to create a clean hem. Pin or iron into place.
- Sew the hems on all sides of the strap pieces.
- After sewing the hems, line the end of one strap up with the top edge of the main piece. Overlay them about 1/2 inch. We want the front side of the strap to be on top of the back side of the apron (see picture above for reference).
- Pin the strap into place.
- Sew the strap onto the main piece. Make sure to backstitch 2 or 3 times to secure it well.
- Repeat this process with the second strap.
Step 6. The Pocket

- For the pocket, begin by folding the top and bottom edges of the pocket piece over 1/4 inch.
- Proceed to fold the top and bottom edges over another 1/4 inch on top of that to create a clean hem on all sides.
- Repeat this process with the short sides of the pocket piece.
- Pin or iron the hems in place.
- Sew the hems on all sides of the pocket.
- Next, pin the pocket to the middle of the main apron piece. I placed mine 5 and 1/2 inches from the sides, 3 inches from the top, and 2 and 1/2 inches from the bottom. NOTE: make sure the top side of the pocket is facing the top of the apron.
- Now sew the two short sides and the bottom of the pocket to the main apron piece. Remember to leave the top of the pocket open.
- Back and forward stitch at the beginning and the end.
Keep in Mind: I wanted a large pocket on my apron, but making it into two pockets would be quite simple. Here’s how to do it.
- Find the center of the pocket and sew down the middle of it. Start and stop at the top and bottom of the pocket. This will transform a large pocket into two smaller ones.
If you make this project and love how it turned out, feel free to come back and comment about your experience. I’d love to see your creation and how you used it!
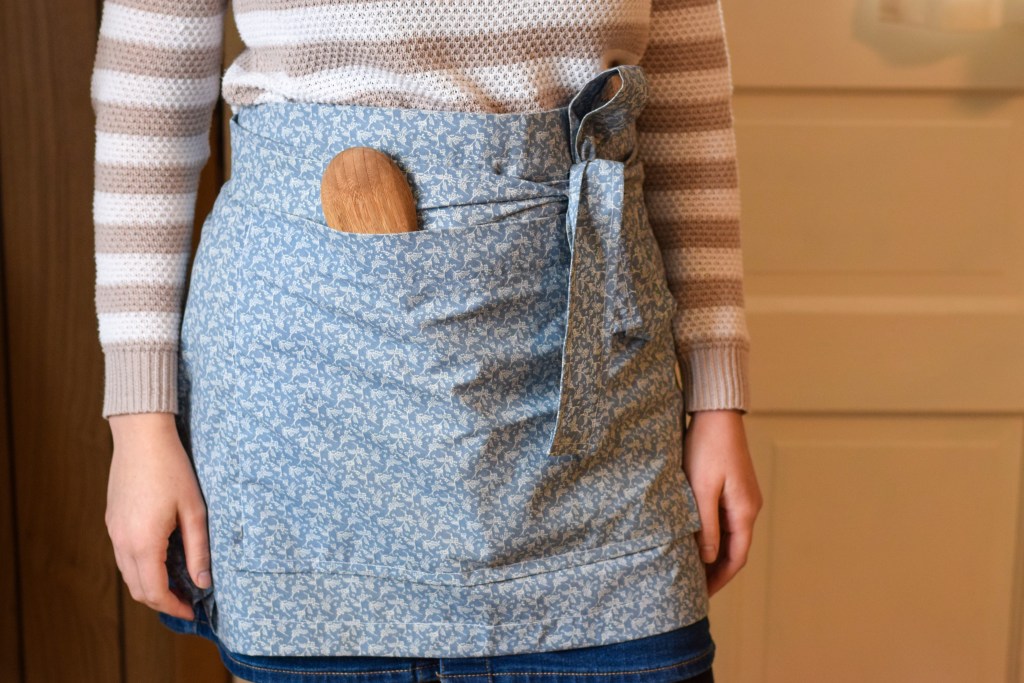
There you have it! A quaint little farmhouse apron that’ll make anyone feel a little more like Ma Ingalls.
Something about wearing it motivates me to bake more, cook better, or tend to my household chores with more enthusiasm. I’m sure that’ll wear off, but I’ll enjoy it for now.
I hope you can find delight in the little things in life to make everyday aspects a joy to partake in.
More Simple Sewing Projects
- DIY Banner for Nursery With Lettering Template
- How to Sew Cafe Curtains
- How to Sew a Pillow Case
- How to Make a Pillowcase From a Placemat
- Easy DIY Table Runner From Drop Cloth